[Linux/Ubuntu]MySQL 외부 접속 허용하기
[Linux/Ubuntu] Allow MySQL external connections

작업 환경
Server Version : Ubuntu 18.04, Ubuntu 20.04
php Version 7.2
Apache/2.4.29 (Ubuntu)
MySql Version 5.7.36
개요
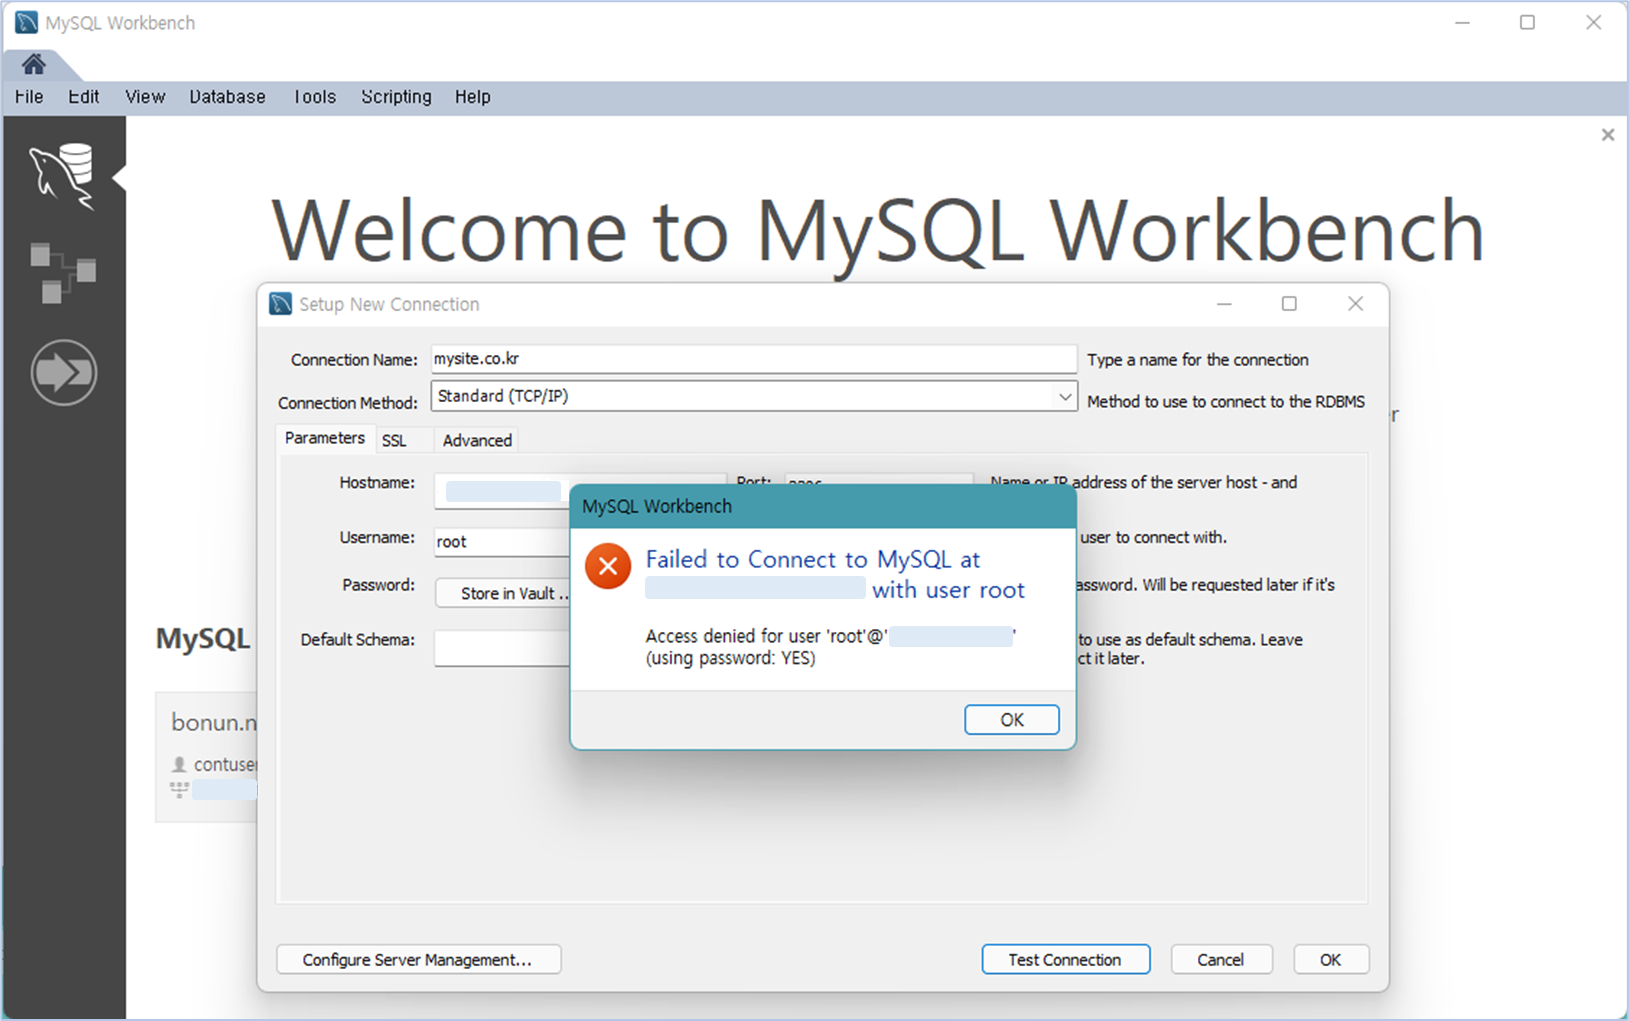
MySQL을 설치하고 난 후 외부에서 'MySQL Workbench' 또는 'SQLyog' 등의 SQL 관리 툴을 이용하여 원격으로 접속을 해 보면 아래와 같은 오류가 발생합니다. 즉, 외부에서 원격으로는 접속이 불가능하고 로컬에서만 접속이 가능합니다. 외부에서 원격으로 접속이 가능하게 하기 위해서는 MySQL 설정을 변경해 주어야 합니다.

지난 글에서 MySQL에서 '사용자 계정을 추가하고 권한을 부여하는 방법'에 대하여 설명드렸습니다. 이번에는 신규로 등록한 사용자 계정을 외부에서 원격으로 접속이 가능하도록 설정하는 방법을 소개합니다.
MySQL에서 사용자 계정을 추가하고 권한을 부여하는 방법은 아래 글을 참조하시기 바랍니다.
[Linux/Ubuntu]MySQL 사용자 계정 추가하기
[Linux/Ubuntu]MySQL 사용자 계정 추가하기 [Linux/Ubuntu] Adding MySQL User Accounts 작업 환경 Server Version : Ubuntu 18.04, Ubuntu 20.04 php Version 7.2 Apache/2.4.29 (Ubuntu) MySql Version 5.7.36..
tomcabin.tistory.com
MySQL 외부접속을 위한 설정 변경
ⓐUbuntu 서버 또는 MySQL 버전에 따라 MySQL 관련 설정파일의 위치가 다를 수 있습니다. CLI 모드에서 'find' 명령을 이용하여 'my.cnf' 파일의 위치를 검색합니다.
|
1
2
3
4
|
root@uncletom:/# find / -name "my.cnf"
/var/lib/dpkg/alternatives/my.cnf
/etc/mysql/my.cnf
/etc/alternatives/my.cnf
|
ⓑ 검색된 파일 중 두번 째 '/etc/mysql/my.cnf' 파일을 열어 내용을 확인합니다.
|
1
|
root@uncletom:/# vi /etc/mysql/my.cnf
|
|
1
2
3
4
5
6
7
8
9
10
11
12
13
14
15
16
17
18
19
20
21
22
|
#
# The MySQL database server configuration file.
#
# You can copy this to one of:
# - "/etc/mysql/my.cnf" to set global options,
# - "~/.my.cnf" to set user-specific options.
#
# One can use all long options that the program supports.
# Run program with --help to get a list of available options and with
# --print-defaults to see which it would actually understand and use.
#
# For explanations see
# http://dev.mysql.com/doc/mysql/en/server-system-variables.html
#
# * IMPORTANT: Additional settings that can override those from this file!
# The files must end with '.cnf', otherwise they'll be ignored.
#
!includedir /etc/mysql/conf.d/
!includedir /etc/mysql/mysql.conf.d/
|
만일 '/etc/mysql/my.cnf' 파일 내용이 위와 같다면 'etc/mysql/mysql.conf.d' 에 위치한 'mysqld.cnf' 파일을 엽니다.
|
1
|
root@uncletom:/# vi /etc/mysql/mysql.conf.d/mysqld.cnf
|
'bind-address'를 찾아서 확인해 보면 'bind-address = 127.0.0.1'로 설정되어 있습니다. 내용을 다음과 같이 수정합니다.
즉, 기존 값을 주석처리('#")하고 'bind-address' 값을 '0.0.0.0'으로 변경하는 것입니다. 저장 후 종료(':wq')합니다.
#bind-address = 127.0.0.1
bind-address = 0.0.0.0
|
1
2
3
4
5
6
7
8
9
10
11
12
13
14
15
16
17
18
19
20
|
[mysqld]
#
# * Basic Settings
#
user = mysql
pid-file = /var/run/mysqld/mysqld.pid
socket = /var/run/mysqld/mysqld.sock
port = 3306
basedir = /usr
datadir = /var/lib/mysql
tmpdir = /tmp
lc-messages-dir = /usr/share/mysql
skip-external-locking
#
# Instead of skip-networking the default is now to listen only on
# localhost which is more compatible and is not less secure.
#bind-address = 127.0.0.1
bind-address = 0.0.0.0
#
#
|
ⓒ변경한 값을 적용하기 위하여 MySQL 서버를 재시작합니다.
|
1
|
root@uncletom:/# service mysql restart
|
ⓓ'MySQL Workbench' 에서 지난 글에서 신규 등록한 사용자 계정인 'testuser' 로 접속해 보면 정상적으로 접속되는 것을 확인할 수 있습니다.

이상으로 MySQL 을 외부에서 원격으로 접속을 허용하는 방법에 대해서 설명드렸습니다.
'Linux Server' 카테고리의 다른 글
| [Linux/Ubuntu]MySQL 사용자 계정 추가하기 (1) | 2022.01.12 |
|---|---|
| [Linux/Ubuntu]MySQL Password Policy(암호 정책) 변경 방법 (0) | 2022.01.12 |
| [Linux]Ubuntu 20.04 웹 서버 구축(4) - MySQL 설치 (0) | 2021.07.07 |
| [Linux]Ubuntu Server - PHP7 파일 업로드 설정하기 (0) | 2021.07.07 |
| [Linux]Ubuntu Server - 고정IP 설정하기 (1) | 2021.07.06 |